Functionize as a new user 2: Using the Slider View

Welcome to part 2 of my series on Functionize as a new user; the first part can be found here. In my last post, I discussed how to create and run your first tests using the Functionize platform. I talked about how I found Functionize, why I needed it, and how I got started. After familiarizing myself with the Functionize platform and Architect and creating a few easy tests, I was ready to dive into some more complicated QA testing.
Introduction
In my last article, I explained my search for a web-based application for simulating robots. I started by working with Gzweb, but the feedback from my customers using this platform was quite negative. I found myself needing a much more user-friendly, “hands-off” web UI, one my customers could use directly inside their browser. I found this platform in robotbenchmark. But this brings a need for QA tools to test my application.
The robotbenchmark application certainly provides a simpler user experience. Unfortunately, it is a basic research application, and as such has a relatively basic UI. The application can also be a bit buggy at times. I obviously can’t introduce it to my customers without some QA testing. Before going live, I’ll need a lot of testing for my widgets. Fortunately, I now know how easy this testing is with Functionize. Therefore, I created a new set of in-depth tests, which I discuss below. After introducing my new tests, I’ll jump right into how I analyzed the results using the Functionize platform.
Creating and running my in-depth tests
In my last post, I explained how I learned the Functionize platform and Architect. This time, I need to really sink my teeth into QA testing. Specifically, I need to make sure robotbenchmark gives my customers the experience I promised them. To test the site, I broke things down into a few discrete tests or test cases as I have learned to call them. Each test case is a list of steps that I recorded as a test using Architect. I then went on to arrange these tests into test Orchestrations, or “play books”. By grouping and ordering tests in Orchestrations, I was able to intelligently execute multiple tests at a time.
First, I need to know that the core functionality of the site works. Therefore, I need two basic tests: one to explore the site, and one to check account creation. (Side note: to test user creation, I used Architect’s advanced data creation feature). I was then able to join these with a sequential Orchestration. Next, I created further tests to make sure the first two robotbenchmark applications run as advertised, and built a second Orchestration using these tests. The image below shows my new tests and Orchestrations.

Tests and Orchestrations in hand, I was ready to execute my tests and analyze the results.
Viewing results
Functionize offers several ways to view test results. The platform gives in-depth data on site performance, test times, and action durations. These data give me a snapshot of how well the site is responding to my tests.
However, I found the most powerful analysis tool is Functionize’s unparalleled visualization of test results. Architect does an amazing job recording my tests. Then, the Functionize platform gives me tools to visualize every step of the test, literally showing every image and pixel. The platform lets me view data values, screenshots, and pre- and post-test site settings. It presents all these visual results in a single, intuitive tool: the Slider View.
Using the Functionize Slider View
Think of the Slider View as a “manual gif.” The Slider View gives screenshots of the site before, during, and after each test step. I get to watch the site change over time, allowing me to pinpoint the exact moment a test fails or succeeds. Additionally, the Slider View lets me view the Architect recorder for each test. I can see what tests came before the current test and what is the current step. And what’s more, the Slider View doesn’t “just” show these site images; it contains tons of hard data.The Slider View is, put simply, amazing. It lets me view a screenshot of the site before, during, and after every step. Not only that, it overlays screenshots between each of these steps. Rather than giving me simple pass/fail metrics, the Slider View lets me literally see exactly what happened during every test action
After running the first of my two Orchestrations, I used the Slider View to analyze my test results. First, I had to make sure new users could navigate the site and create a new login. The results of the first Orchestration are shown below.
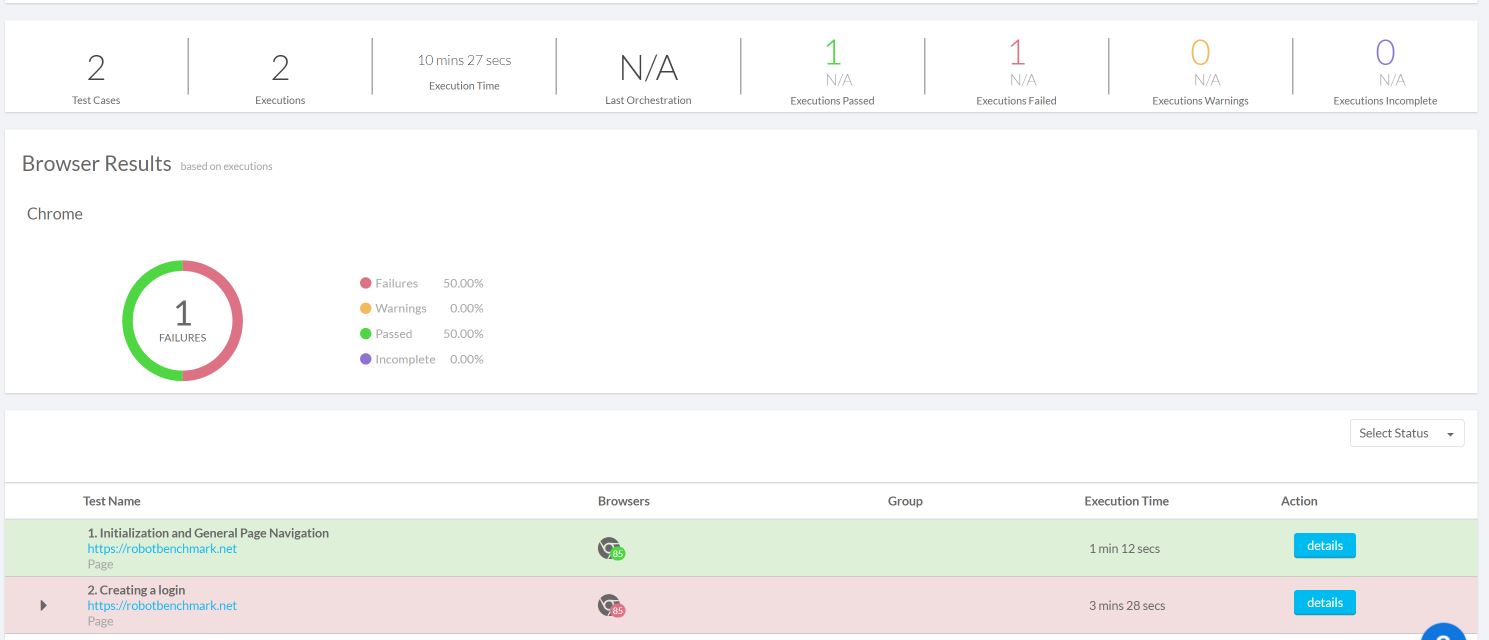
The results quickly showed me that the first test, general site navigation, went off without a hitch. However, the second test, new account creation, failed. This is quite a glaring problem, since my customers can’t use tools they can’t access. But why did it fail? I was able to find out quickly using the Slider View as I explain below.
Tracking down the issue
So, what does the Slider View look like for my failed test? How can the Slider View quickly and comprehensively tell me why my test failed? To start, below is the first Slider View page for the failed test.
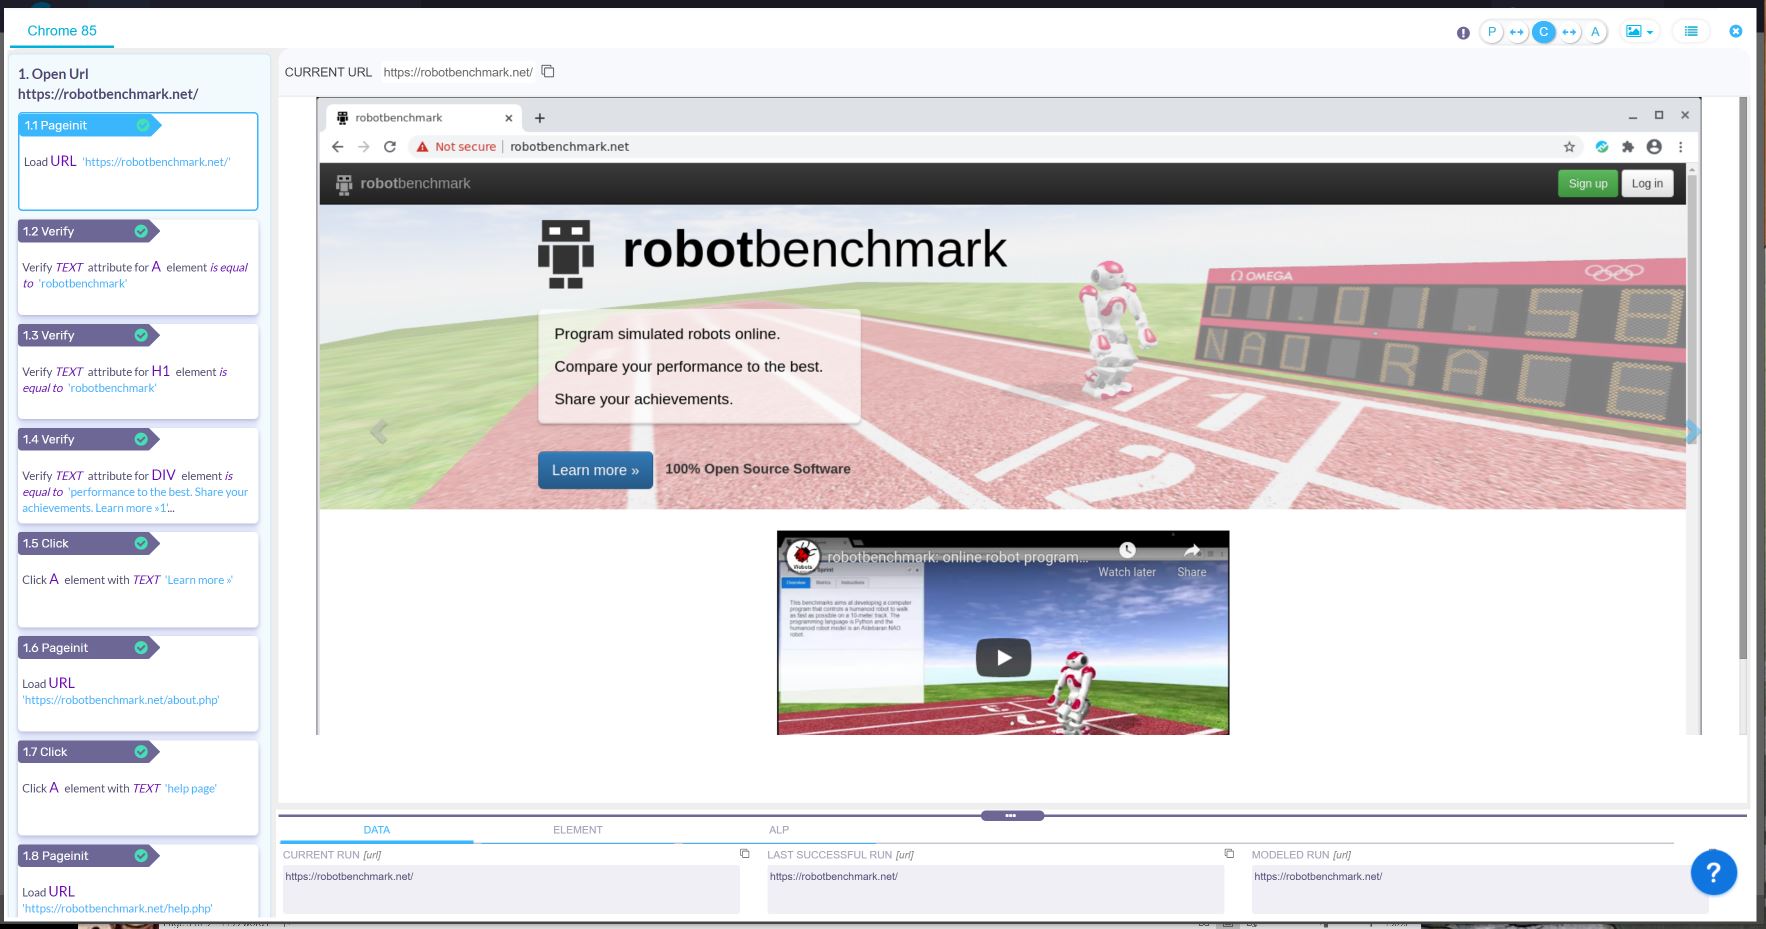
Right away, out leap some anomalies. However, these anomalies are simply related to the properties of the verification images.

This test case shows the power of the Functionize platform and Architect. Other tools would have simply thrown a “fail” for this step. Not so with Functionize. The platform is smart enough to know that the test did pass, despite the anomaly. Furthermore, the Slider View shows me exactly what the anomaly was, along with how serious of a problem it is.
Moving on to the important step – the one that failed. Slider View was able to show me that the data generation feature of Architect worked and provided a “dummy” user. However, the next step—verifying the new user request—failed.
Analysing the problem
With other QA testing tools, I would be left scratching my head as to why this test failed. After all, the user account was created fine. So why did my test fail? Turns out it was because of simple user error on my end. I did not take into account the randomization of the user and email data. When I created the tests using Architect, I used random data.
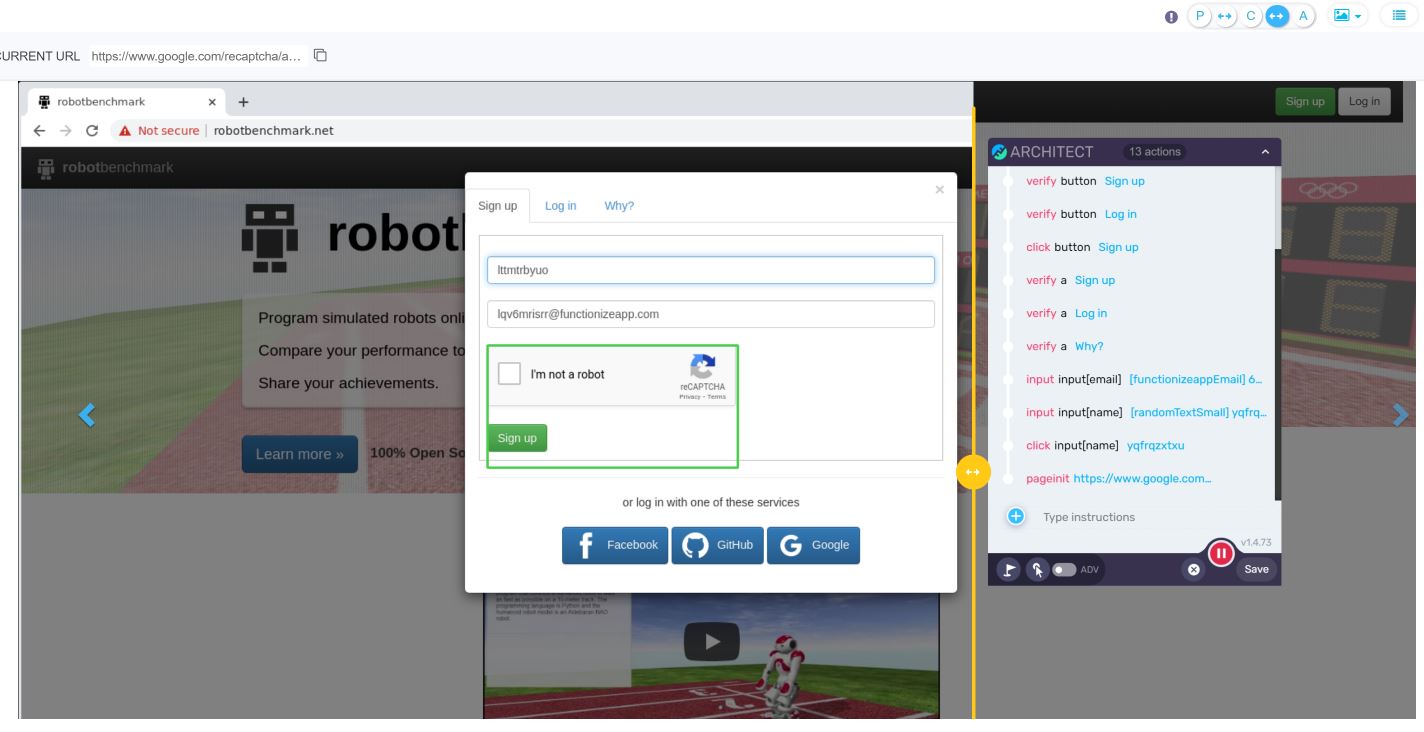
However, when I executed the tests, Functionize created a new set of random user data. I had used the first data in the test, not the actual random data generated each test run
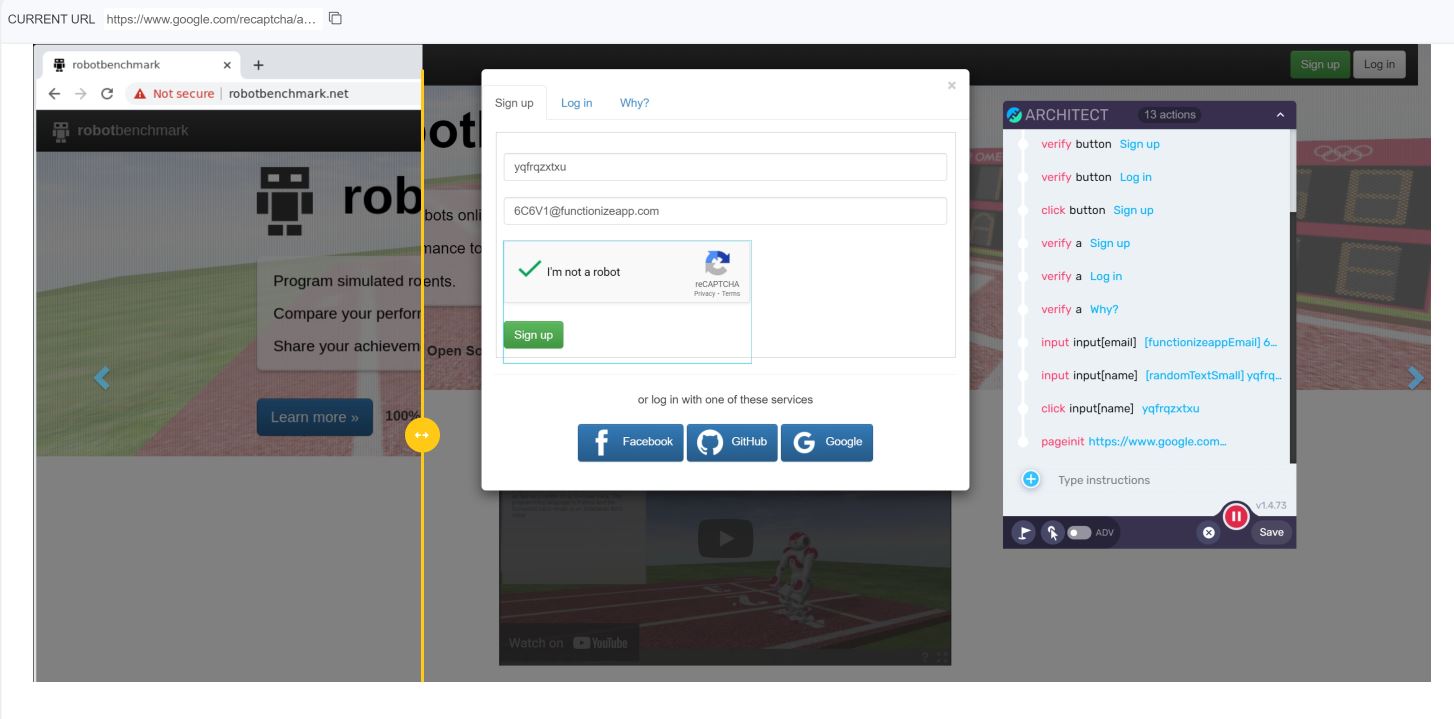
A complete rookie mistake caused by my total inexperience with QA testing. But here’s the power of Functionize and Slider View: I caught that mistake the first time I ran the tests. Not only that, I caught the mistake within 10 minutes. I could see the site before and after the action and the data inputs during the test, meaning I could see what broke, when, and why. And fixing the mistake was pretty simple too. I just needed to update the test to store the email it generated as a test variable.
My key takeaway
This experience has been really insightful for me. Almost without realizing it, I am learning to be a test automation expert. For instance, when I executed the second Orchestration, both these tests failed, since I had failed to create a valid user in the previous step. Without the Functionize platform, I would be facing three failed tests and only a vague idea of the cause. With the Functionize platform, I found out exactly where the tests broke, why, and how to fix them. What could have been hours and hours of tedium trying to find out if my test or the site were the problem, I had everything I needed to know given to me in a user-friendly and intuitive way. Next time, I will explain how I monitor my tests as I work on evolving my application.


